Generate the API Access Token
The following steps illustrate how to use Postman to generate an access token for a specified user and company.
1. Creating the Request
Create a new request in Postman as follows:
-
Change the
HTTP verbfrom GET to POST. -
Specify the
URLto theToken/authenticateByApiKeyAPI endpoint i.e., https://fslpresales.fslcgix-uat.co.uk/FSLPresales_WebAPI/api/Token/authenticateByApiKey. -
Add a request header with key
ApiKey. The value should be set to the API key configured earlier in IIS (ServiceApiKeyenvironment variable). For example, “95e37e3b-166f-4b3b-93aa-e2d2f09077a2”. -
Add a request header with key
UserName. The value is the CGiX user to generate the reports for e.g. “CgixReportingUser”. -
Add a request header with key
CompanyId. The value is the CGiX company ID associated to the provided CGiX user. For example, if user “CgixReportingUser” belongs to company with ID “FSL”, then set theCompanyIdto “FSL”.
2. Sending the Request
Click the Send button to send the prepared request.
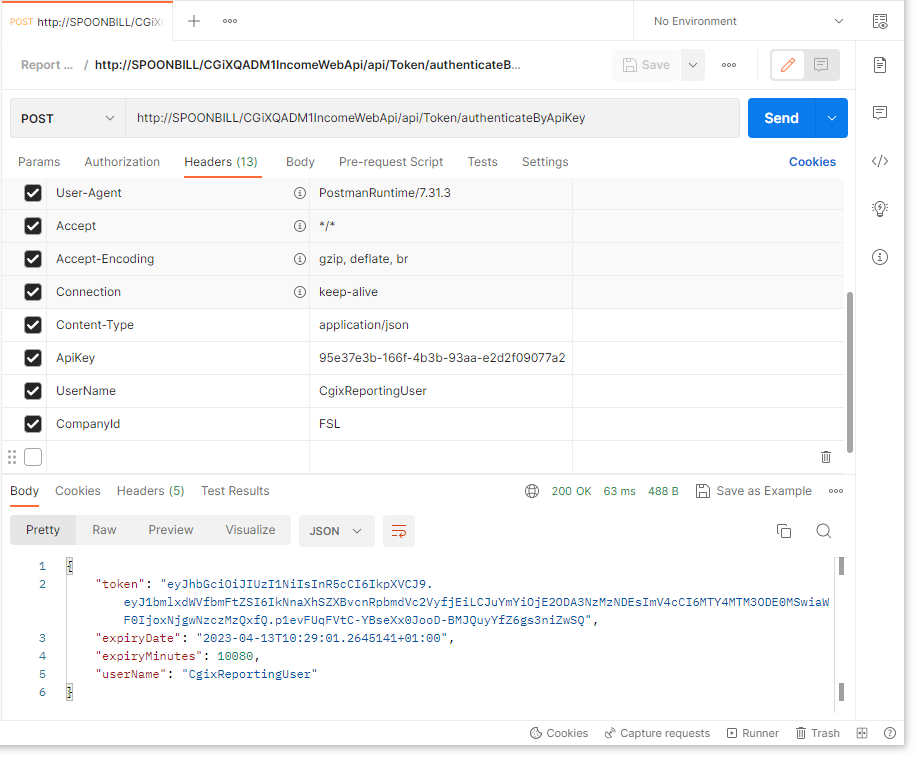
Request and response in Postman
3. The Response Body
The response returns an access token, its expiry date, expiry in minutes and the user name for which the token was created.
The token can now be used in the subsequent calls to the API to generate and access reports.
Token ExpiryBy default, the token is valid for 7 days or 10,080 minutes.
The token expiry duration in days can be changed in the CGiX Web API configuration file (appsettings.json).
"ApiKeyConfiguration": {
    "ExpiryInDays": 7
},